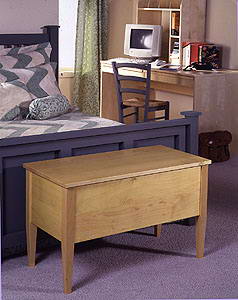
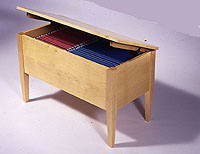
Set this file chest next to your
favorite easy chair to serve the usual end table
purposes, and when you lift the hinged stay-open top,
your personal papers are at your disposal. The chest is
sized to accommodate both legal-size and letter-size
papers and hanging files. Its simple styling matches
that of our combination table-chest. There is an
important difference between the two pieces, however.
Aside from its filing capability, this chest’s generous
proportions permit it to swallow anything from a couple
of small pillows to a blanket--or just about anything
else lying around and cluttering the view of your family
room. Likewise, its size and styling make it suitable as
an elevated blanket chest in a bedroom or loft. And, if
your shop is modestly equipped, you’ll like the fact
that it’s easy to build.
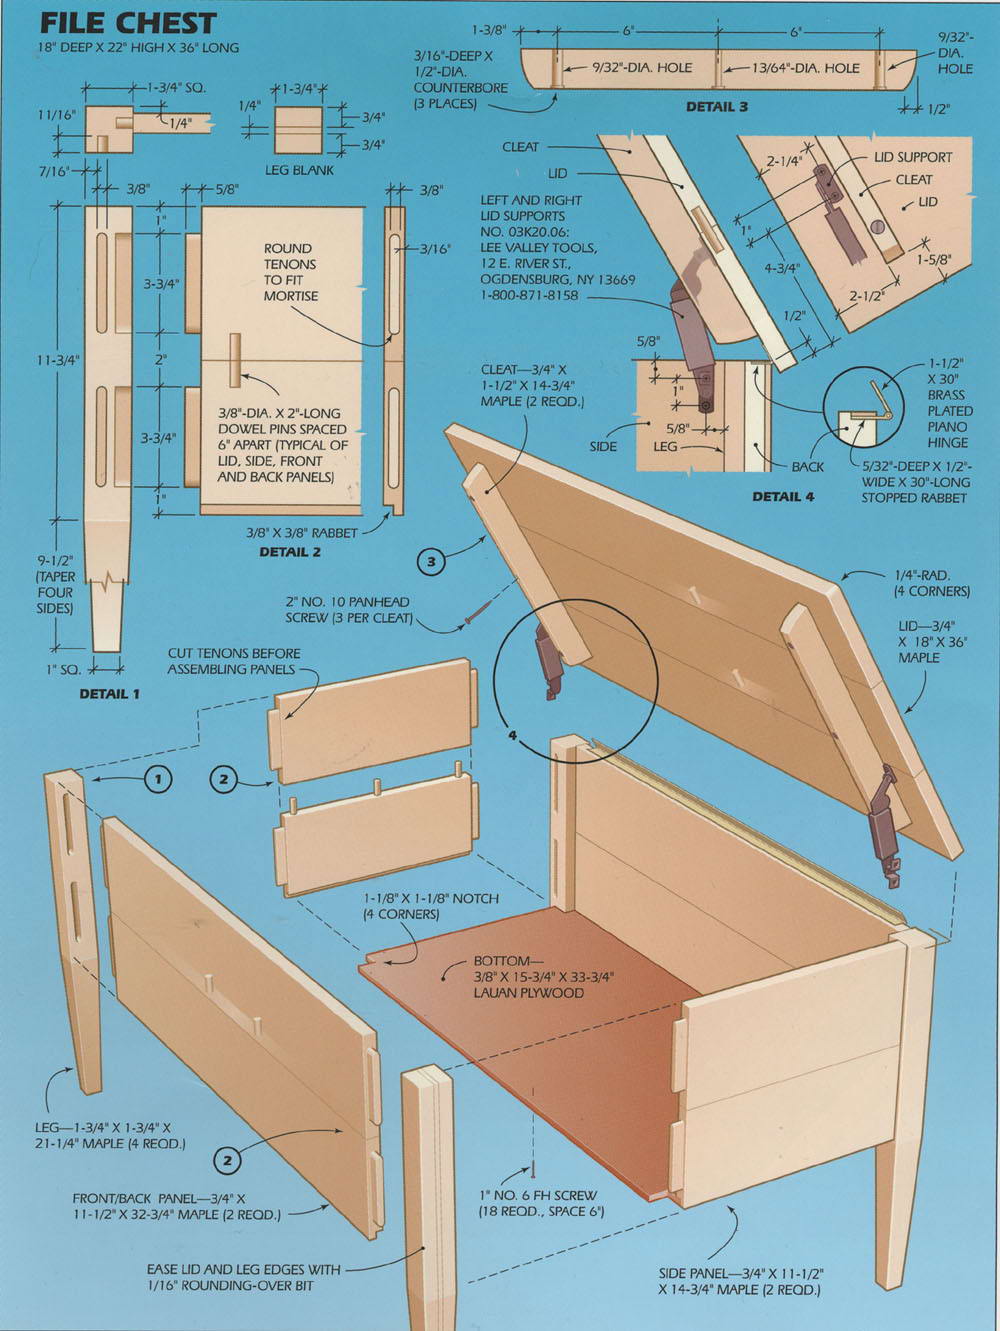
Making Panels To get started, rip and
crosscut the stock for the front, back and side panels
to the sizes indicated in the accompanying drawing. For
the top, cut all three boards about 1 in. oversize in
length. The two outside boards are cut about 1/2 in.
oversize in width while the center board is cut to the
6-in. finished width. This allows for trimming the top
to size.
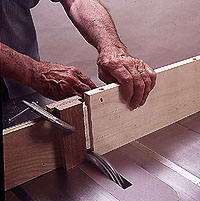
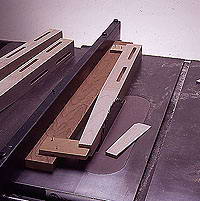
Arrange the boards back to back in a vise and, using
a square, mark the dowel centerlines across both edges.
Then, always working the same side of a doweling jig to
the face of the workpieces, bore the dowel holes (Photo
1).
The end tenons on the side panels must be cut before
the paired boards are edge glued. For best results, add
an auxiliary fence to the saw’s miter gauge, and clamp a
stop block to the fence to ensure that the rabbet cuts
are of uniform size. Using a dado blade, make a cut on
the face of the workpieces. Then raise the blade to
project 1 in., and pass each board over the blade on
edge to form the tenon (Photo 2).
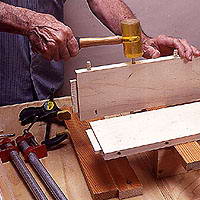
Prepare for edge gluing by readying three bar or pipe
clamps, four small clamps and four cauls. Apply paste
wax to the cauls so they don’t get glued to the panel.
Tap the dowel pins into their holes and then apply glue
to the panel edges (Photo 3).
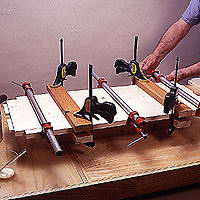
Join the pieces. Then alternately apply pressure to
the bar clamps and to the caul clamps to close the joint
and to keep the panel from buckling (Photo 4).
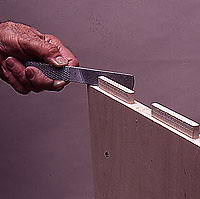
Use a belt and finish sander to dress the panel
faces. Then use a 4-in. hand file or a chisel to round
the tenons (Photo 5).
To complete the panels, cut the rabbets for the
bottom (Photo 6). Next, use a router with a straight bit
to cut the hinge rabbet. Then switch to a 1/16-in.
rounding-over bit to ease the panels’ exposed
edges.
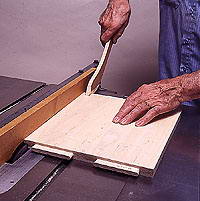
1-Use a dowel jig to bore holes in the
panel edges. A piece of tape on the drill bit
serves as a depth stop.
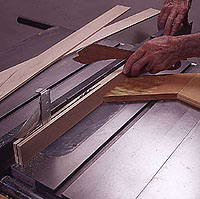
2-Cut the tenons using a dado blade, and
a stop block clamped to the auxiliary fence on the
miter gauge.
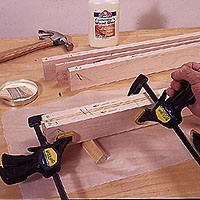
3-Tap the dowel pins into their holes
with a mallet and then spread a thin layer of glue
on the edges of each board.
4-Cross cauls keep the panel from bowing
as you apply clamping pressure. Glue will not
stick to waxed cauls.
5-Round the tenons using a rasp or by
paring with a chisel. Note that the rasp has edges
that are not serrated.
6-Using a dado head and an auxiliary
fence on the table saw, cut the rabbet that the
bottom panel fits in.
Making The Legs Make the legs from two
45-in.-long blanks, which you’ll later cut into four
finished lengths. The legs require that three pieces of
wood be glued together. The center piece is sawed from a
thicker piece. Be sure to use a smooth cutting blade,
the saw’s antikickback splitter, a feather board and a
pushstick for this operation (Photo 7).
Glue and clamp the leg pieces (Photo 8). To keep the
pieces from sliding out of alignment during clamping,
bore two 3/32-in. holes in the ends of the blanks, and
use 2-in.-long finishing nails as alignment pins. The
pins are inserted in an area to be cut off.
Mark the mortise locations on each leg, and be sure
to arrange the legs so that the surfaces showing the
glue joint face the chest’s ends. Mark each leg mortise
with centerlines 3/8 in. apart, and then bore the
mortise holes (Photo 9). Trim the mortise to finished
dimension (Photo 10).
Use a jig to cut the leg tapers. Place the leg
between the rear stop and the front notched block, and
make two cuts. The notched block is tack nailed so it
projects 1 in. from the guide board. Make a taper cut on
two adjacent faces, and then reposition the block so the
notch projects 1-3/8 in. Cut the remaining tapers (Photo
11).
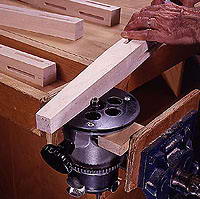
Then use a router to ease their corners (Photo
12).
7-Resaw the center piece for the leg
blanks carefully. To do this safely, use a feather
board and a kerf splitter.
8-Mark grain direction on the leg blank
pieces. Then glue and clamp them using nails as
alignment pins.
9-Bore the mortise holes in the leg
blanks on the drill press. The blank is positioned
by two fences.
10-Chisel the waste from the leg
mortises. The mortise ends are round and match the
shape of the tenons.
11-Cut the leg tapers using a jig on the
table saw. The jig’s notched block is repositioned
after two cuts.
12-Use a router table, or clamp the
router in a vise, and use a rounding-over bit to
ease the sharp edges on the
legs.
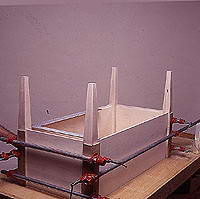
Assembly Before gluing the parts together,
make a dry assembly to prepare the necessary cauls.
Check the clamp adjustments and the fit of parts.
Do the gluing in two stages. Apply glue only on the
short end panels and legs. Then make a temporary
complete assembly. When the glue has dried, remove the
clamps. Then glue and clamp the long side panels to the
preglued end subassemblies (Photo 13).
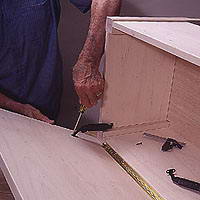
Cut the bottom panel to size and attach it with
screws. Trim the top to size. Rip and crosscut its
cleats, and bore the holes in them. The two outside
holes are oversize to permit the lid to move with
changing humidity.
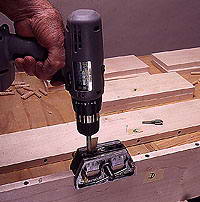
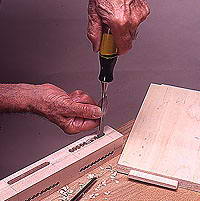
Bore the pilot holes for the hinge, lid supports and
cleats. First, install the hinge at the back, then lay
the table on its back to join the second leaf of the
hinge to the lid. Attach the lid support in the same
manner (Photo 14). Attach the cleat with screws only,
not glue.
After finish sanding, we applied three coats of clear
satin polyurethane. The first coat was tinted with
yellow ochre universal color, available at art supply
stores.
13-Glue and clamp the subassemblies and
panels. The clamps on the ends ensure proper
alignment.
14-Attach the lid supports to the side
panels first, then to the lid. The cleats are
attached last.