3-drawer utility cabinet (Floor cabinet system)

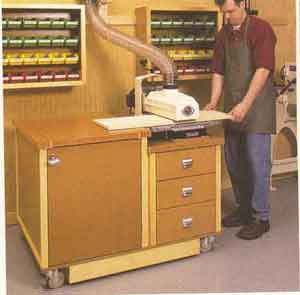
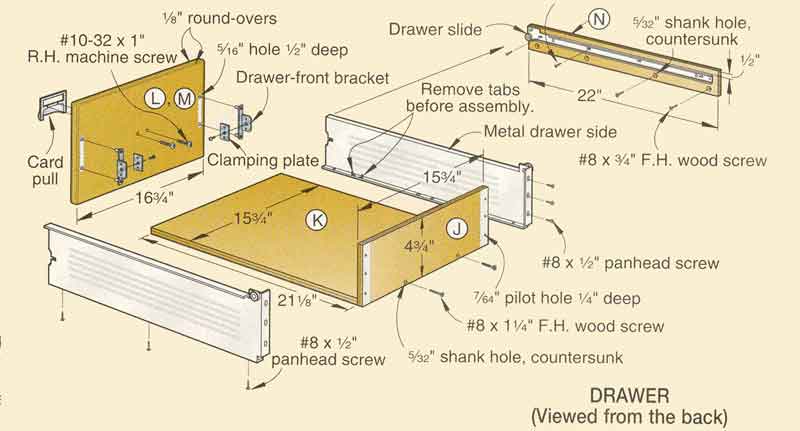
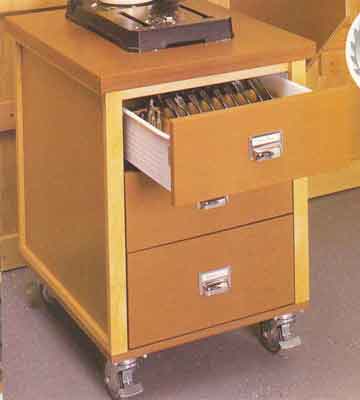
Inexpensive materials and basic joinery make for speedy construction of this hardworking shop cabinet. Even the drawers won't slow you down. With their special side/slide hardware, they practically build themselves.

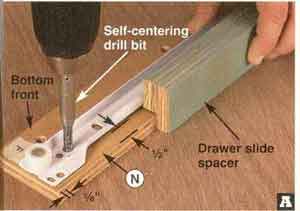
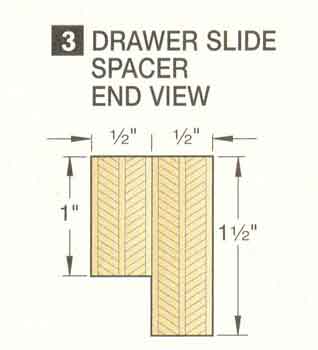
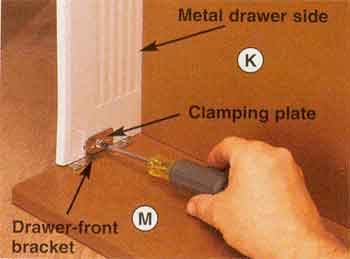
If saving time and money is important to you, you'll really appreciate the drawer hardware used in this project. Costing little more than standard slides, this epoxy-coated steel hardware combines both drawer side and slide in one piece. For more on this innovative hardware, see "Make the fastest drawers in the west (or east)" on page 76.
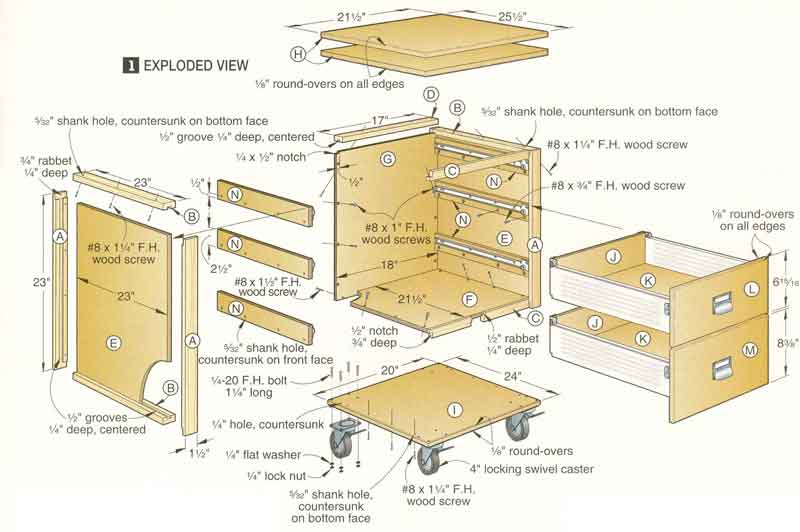

Start with the case

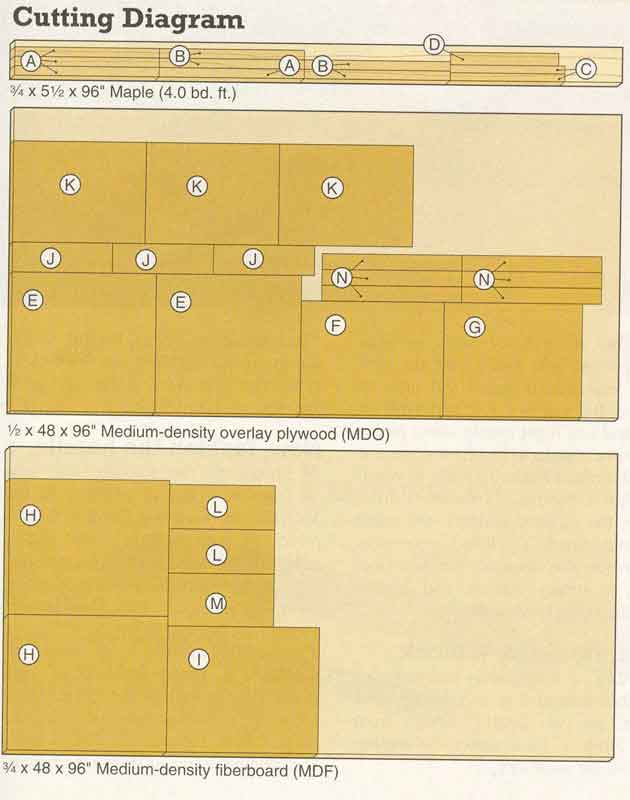
1 Cut the stiles (A), side rails (B), front rails (C), and back rail (D) to the sizes listed in the Materials List. With a dado blade adjusted to match the thickness of the 1/2" plywood side panels (E), cut centered grooves in parts A, B, and D, where shown on Drawing 1. Then cut the 1/4"-deep rabbet along the top edge of the lower front rail (C) and the 1/2" notches 3/4" deep in both front rails. Now cut the rabbets in the stiles (A). Finish-sand all the parts to 180 grit.

2 Cut the side panels (E) to the size listed. Glue and clamp the stiles and rails (A, B) to the side panels, checking the assemblies for square.

3 Cut the bottom (F) and back (G) to the sizes listed. Cut the 1/4x1/2" notches in the back's top corners.
 

4Retrieve the lower front rail (C), and glue and clamp it to the bottom (F), keeping the ends flush. Retrieve the back rail (D), and glue and clamp it, centered, on the back (G). Now, clamp the back to the bottom as shown, and drill screw holes through the back and into the bottom. Drive the screws.

5 Place the first side assembly (A/B/E) flat on a horizontal surface. Squeeze a bead of glue on the side panel along the rear stile and the lower side rail. Place the bottom/back assembly (C/F/D/G) on the side assembly, and clamp it in place. Now drill angled countersunk screw holes through the bottom and back and into the rear stile and the lower side rail. Drive the screws.

 6 Apply glue to the upward-facing edges of the bottom and back panels. Position the second side assembly, and clamp it in place. Turn the cabinet over. Then, as before, drill angled countersunk screw holes, and drive the screws.

  See раде 12 to learn how to combine this three-drawer cabinet with a flip-top cabinet and a mobile base to create the multifunction work center, above.
 
7 Clamp the upper front rail (C) in place. Drill angled countersunk screw holes through the front rail and into the side rails (B). Drive the screws.

 8 Cut two 3/4 X 21 1/2 X 25 1/2" pieces of medium-density fiberboard (MDF) for the top (H). Glue and clamp them together, keeping the ends and edges flush. Sand the edges smooth, and rout Vs" round-overs along all the edges.

9 Cut the mobile base (I) to size, and rout 1/8" round-overs along the top and bottom edges. Using a caster's mounting plate as a guide, mark mounting-hole locations at all four corners. Drill 1/4" holes and countersink them on the panel's top face.

Use a spacer to position the drawer slide 1/2" down from the cleat's top edge. With the slide's front end 1/8" from the cleat's front edge, drill the pilot holes.
 
Add the drawers
1 Cut the drawer backs (J), drawer bottoms (K), and drawer fronts (L, M) to size. Ease the edges of the bottoms and backs with a sanding block. Rout 1/8" round-overs along the front and back edges of the drawer fronts. Drill the screw holes for the pulls, where shown on Drawing 2. Finish-sand the parts. Apply two coats of satin polyurethane to the bottoms and backs and three coats to the fronts, sanding between coats. Now, to assemble the drawers using the metal side/slides, see the sidebar on pages 76 and 77.

2 With the drawers made, cut the cleats (N) to size. Mark the bottom front corner of each cleat, making sure you have three mirror-image pairs. Drill countersunk screw holes through the cleats 1/2" up from their bottom edges, where shown on Drawing 1.

З Маке the drawer slide spacer shown on Drawing 3 from 12"-long scraps of 1/2" plywood. Using the holes in the drawer slides' cabinet members as guides, drill pilot holes in the cleats, as shown in Photo A.

 
4 Cut two 2x18" pieces of scrap for cleat positioning spacers. Use them to position the top pair of cleats (N), as shown in Photo B. Now trim the spacers to 10 7/8", and then 3 1/8" to mount the middle and bottom pairs of cleats, where shown on Drawing 4.


Finish and assemble
1 Finish-sand the case and the top. Apply two coats of satin poly-urethane to the case and three coats to the top, sanding between coats.
2 Place the top (H) upside down on a pair of sawhorses. Turn the cabinet upside down, center it on the top, and clamp it in place. From the outside of the cabinet, drill angled countersunk screw holes through the side rails (B) and back rail (D) and into the top. Drive the screws.
3 With the hardware shown on Drawing 1, bolt the casters to the mobile base (I). Place the base on the cabinet, drill countersunk screw holes through the base and into the lower side rails (B). Drive the screws, and place the cabinet right side up on the floor.
4 Attach the drawer slides' cabinet members to the cleats (N), driving the screws into the previously drilled holes. Fasten the pulls to the drawer fronts, and slide the drawers into the cabinet. Adjust the drawer fronts to leave 1/4" between the top (H) and the top
 

With their ends against the cabinet's bottom, use a pair of 18"- long spacers to position the top cleats. Then glue and screw the cleats in place.

Make the fastest drawers in the west (or east)

Initially developed for the commercial kitchen-cabinet trade the all-in-one metal drawer side/slide hardware used in this project allows you to build sturdy drawer boxes in record time. But that's not its only advantage. The side/slide hardware costs about the same as regular drawer slides alone while eliminating the wood for drawer box sides and fronts. And, adjustable brackets attach the finished drawer fronts to the sides, allowing you to fine-tune the gaps between drawers during final cabinet assembly. Here's how to build a drawer using this time- and money-saving hardware. Note: The metal sides have a pair of raised tabs (see drawing below) used for positioning in mass-production applications. Clip off these tabs before assembling your drawers.
Step 1   

Drill screw holes and fasten the drawer back (J) to the drawer bottom (K), where shown on the drawing, right. Position the metal sides on the back/bottom assembly, drill pilot holes, and screw them in place, as shown in the photo, above. For easy assembly, a 12x18" scrapwood assembly frame 6" high holds the back and sides clear of your worktop.


Step 2
To accurately place the drawer-front brackets on both the small drawer fronts (L) and the large drawer front (M), make the drilling guide according to the drawing, far right. To avoid confusion, draw brackets on both of the jig's faces to connect the pairs of holes for parts L and M, as shown. Mark the door front's center-line on its back face. Place the guide's cleat against the front's bottom edge, align the guide's edge with the marked centerline, and clamp it in place. Drill 5/16" holes 1/2" deep, as shown in the photo, right. Flip the jig, and repeat at the drawer front's other end.
 
Step 3
With the bracket's drawer-side flange to the outside, drive its plastic inserts into their holes, as shown, right. Use a scrap of wood to evenly distribute the force. Loosely fasten the clamping plates to the brackets with the provided machine screw. Slide the drawer sides between the brackets and the clamping plates, as shown, far right, and tighten the screws.
 
Hosted by uCoz