|
quick-and-easy
mitered half laps
Team up a half lap with a basic miter, and
you instantly create a handsome joint that also provides plenty of
strength. |
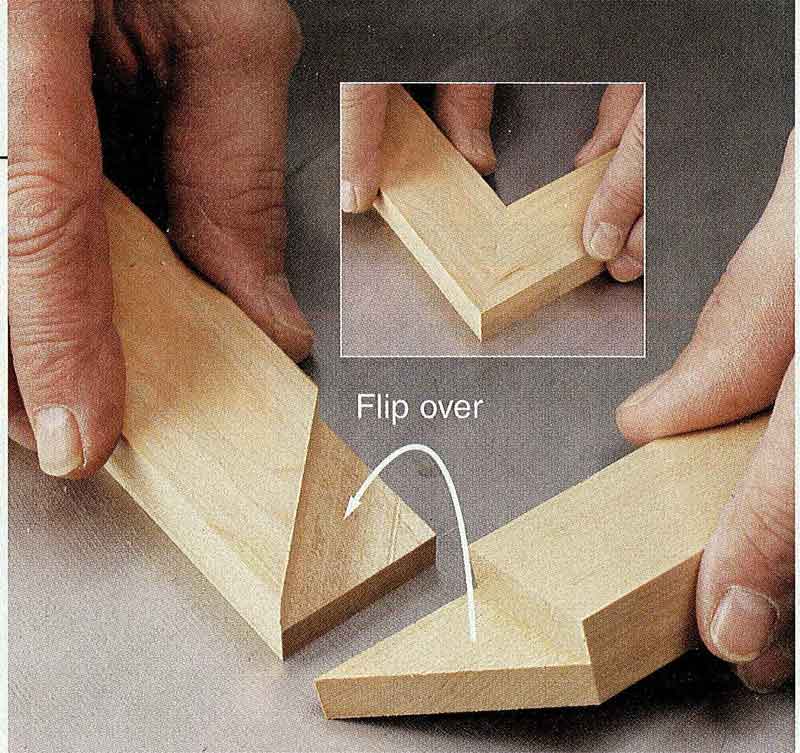 |
A mitered half-lap joint consists of two parts like the
ones shown here. Just flip the piece at right, and the mating miters
form the completed joint, inset. We placed the exposed end grain at the
top and bottom of the frame.
|
Miters look great, but in many applications they need
reinforcement from wood splines or metal fasteners for strength. But as
you can see in the photos above, there's a better way to add beef to a
miter: by combining it with a half lap. Why's that' Because of the
joint's ample face-grain gluing surfaces.
To create this reliable joint, you'll need a tables aw equipped with a
dado set that produces flat, smooth cuts. You'll also need a scrapwood
stop that attaches to your rip fence, an accurate miter gauge equipped
with an auxiliary fence, and a simple plastic guard that we'll tell you
how to make.
To get started, use a straight piece of solid wood or plywood to make
the stop for your tablesaw's rip fence. Cut the stop about 12" long, and
narrower than the height of your rip fence. Clamp it to the rip fence
with the front end slightly back from the dado blade.
Check your miter gauge for accuracy at both 45░ settings, and then add
an auxiliary miter-gauge fence that's narrower than the height of your
rip fence. Make it more reliable by adding self-adhesive, 120-grit
sandpaper to its face to keep the workpiece from slipping. Be sure to
place the sandpaper away from the business end of the fence to prevent
the abrasives from contacting the dado set and making it dull.
Some of the cuts you'll make tend to throw chips straight up in the air.
That's why we put together a safety guard from scraps we had in the
shop.
To make the guard, attach a piece of 1/8õ8õ16" acrylic to a 3/4x2x30"
board with 1" panhead screws. The dimensions aren't critical; size your
guard so that it extends past the dado set when you cut.
|
|
8 EASY STEPS TO MITERED HALF LAPS |
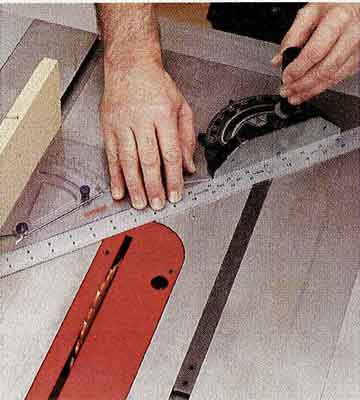
| 1 A tight miter joint
begins with precise equipment. Make sure your tablesaw table sits square
with the blade, using the method described on page 56. Then set your
miter gauge as shown on page 58, or use this trick. Insert tight-fitting
3/4" scrap in the right miter-gauge slot, and place your miter gauge in
the left slot. Slide an accurate 45░ angle against the scrap, and place
a steel rule against the miter gauge, left. Then line up the angle, the
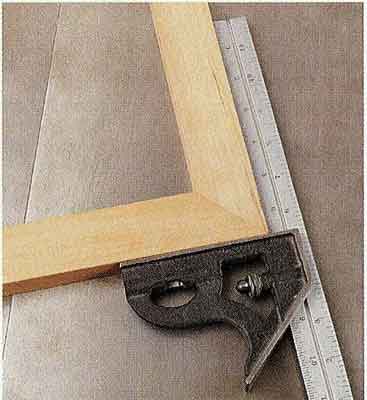
rule, and the miter gauge. To double-check the accuracy of your setup,
cut miters on two pieces of scrap, hold them together at a right angle,
and check them with a reliable square, right. They should fit with no
gaps. |
 |
 |
 |
 |
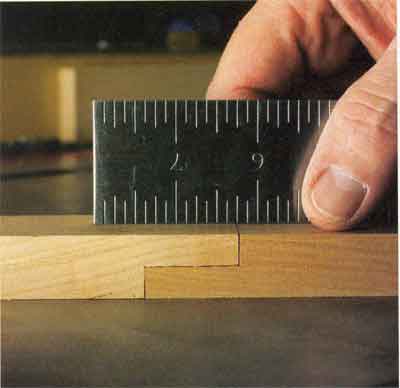
| 2 Install a full-width
dado set, and raise it to cut exactly half the thickness of your
workpiece. (If your dado set produces rough surfaces, see issue 150 for
our dado set test.) Make test cuts on scrap pieces of the same thickness
as your workpieces. Mate the two pieces, and use a rule or other
straightedge to check for a flush fit, as shown. Cut your stiles and
rails to finished length. |
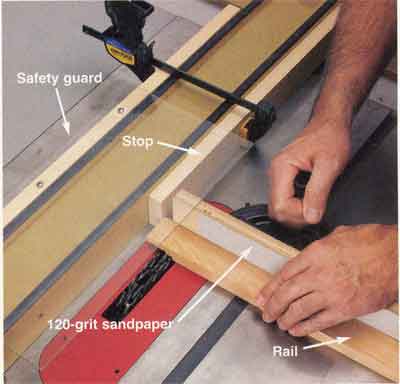
3 CIamp your safety
guard and stop in place, as shown. Adjust the rip fence so that the
distance from the stop to an outside tooth of your dado set equals the
width of your workpiece. Set your miter gauge at 90░, and cut away the
underside of each rail at each end. Make two or three passes, as
necessary. For the final pass, butt the end of the rail against the
stop. |
 |
 |
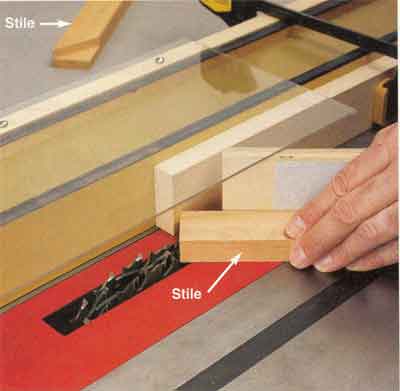
| 4 Set your miter gauge
at 45░ as shown, and place a stile facedown against it. Align the
leading corner with an outside tooth on the dado set. Adjust your rip
fence so that the opposite corner of the stile contacts the stop. Lock
the fence in place, and leave it there for the remaining cuts. Make the
needed passes to form a mitered recess on the underside of the stile. |
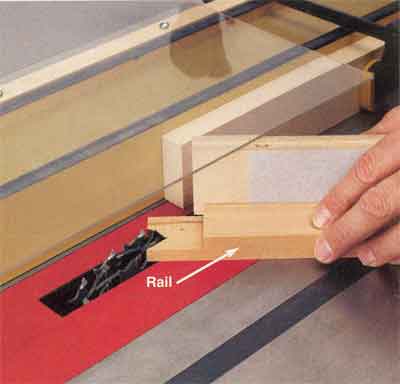
5 Place
your rail on the tablesaw with its inside corner butted against the
stop. Miter-cut this half lap with just one pass. The inside corner
drops away as you complete the cut.
|
 |
 |
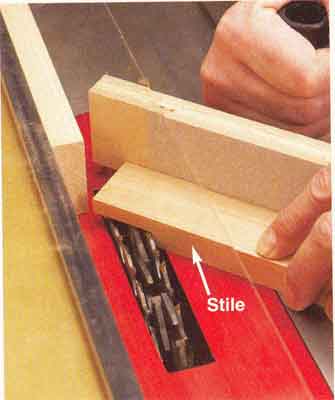
| 6 Now, swing your miter
gauge to the opposite 45░ setting, again using the procedures from Step
1. (Shop tip: Buy extra miter gauges so you can leave them set at 90░
and both 45░ settings.) Now, butt the inside corner of the stile against
the stop, and cut each of the remaining two stile ends, as shown. |
7 Complete
the cuts for your frame by mitering the remaining two rail ends, as
shown. Again, place the inside corner of the workpiece against the stop
to line up each cut. |
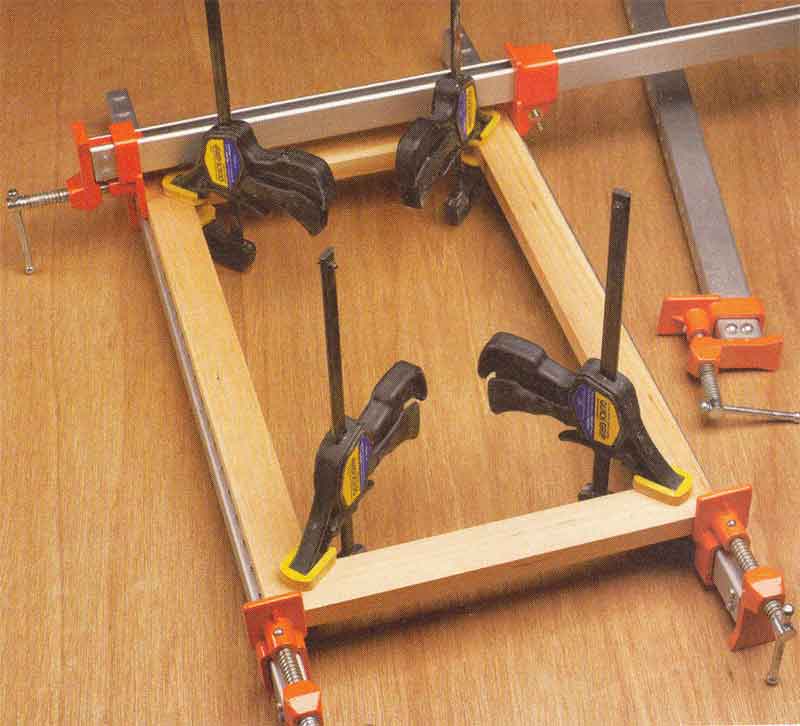 |
| 8 A type of
glue with longer open time, such as Titebond Extend, comes in handy when
you assemble mitered half-laps. Lay the frame on a pair of bar clamps,
and make them snug. Now, add a small clamp vertically at each joint to
apply face-to-face pressure. Finally, add two bar clamps on top of the
frame and perpendicular to the first pair. (We've left one off for
clarity. |